
1、下载Xdebug
2、安装
1、接下源码
1 | tar zxvf xdebug.tar.gz |
2、编译源码
1 2 3 4 5 | cd xdebug /usr/local/php/bin/phpize ./configure --enable-xdebug --with-php-config=/usr/local/php/bin/php-config make make install |
安装完成后会出现:
1 2 3 4 5 6 7 8 9 10 11 12 13 14 15 16 17 18 19 20 21 22 | Installing shared extensions: /usr/local/php/lib/php/extensions/no-debug-non-zts-20160303/ +----------------------------------------------------------------------------------------------------+ | | INSTALLATION INSTRUCTIONS | ========================= | | See http://xdebug.org/install.php#configure-php for instructions | on how to enable Xdebug for PHP. | | Documentation is available online as well: | - A list of all settings: http://xdebug.org/docs-settings.php | - A list of all functions: http://xdebug.org/docs-functions.php | - Profiling instructions: http://xdebug.org/docs-profiling2.php | - Remote debugging: http://xdebug.org/docs-debugger.php | | | NOTE: Please disregard the message | You should add "extension=xdebug.so" to php.ini | that is emitted by the PECL installer. This does not work for | Xdebug. | +----------------------------------------------------------------------------------------------------+ |
3、修改配置文件
1 2 3 4 5 6 7 8 9 10 11 12 13 14 15 16 17 18 | sudo vim php.ini #加一下内容 [Xdebug] zend_extension=/usr/local/php5.6/lib/php/extensions/no-debug-non-zts-20131226/xdebug.so xdebug.idekey = PHPSTORM xdebug.auto_trace = on xdebug.default_enable = on xdebug.auto_profile = on xdebug.collect_params = on xdebug.collect_return = on xdebug.profiler_enable = on xdebug.remote_enable = 1 xdebug.remote_host = 192.168.1.225 xdebug.remote_port = 9059 xdebug.remote_handler = dbgp xdebug.remote_connect_back = 1 xdebug.trace_output_dir = "/usr/local/php/xdebug/" xdebug.profiler_output_dir = "/usr/local/php/xdebug/" |
重启lnmp后通过php -v应该可以看到
1 2 3 4 5 | PHP 5.4.45 (cli) (built: Jan 19 2018 10:30:47) Copyright (c) 1997-2014 The PHP Group Zend Engine v2.4.0, Copyright (c) 1998-2014 Zend Technologies with Xdebug v2.4.1, Copyright (c) 2002-2016, by Derick Rethans with Zend Guard Loader v3.3, Copyright (c) 1998-2013, by Zend Technologies |
4、安装火狐xdebug插件
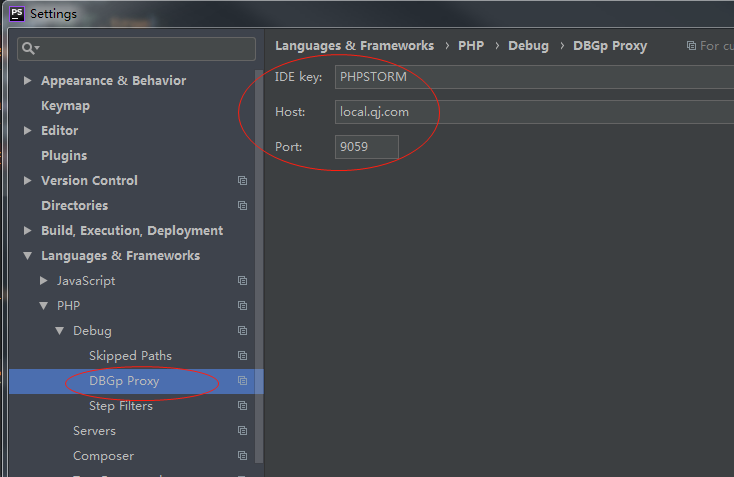
安装完毕之后, 打开该插件的options, 设置IDEKey为PhpStorm.
需要和phpstorm中设置的ide key 保持一致
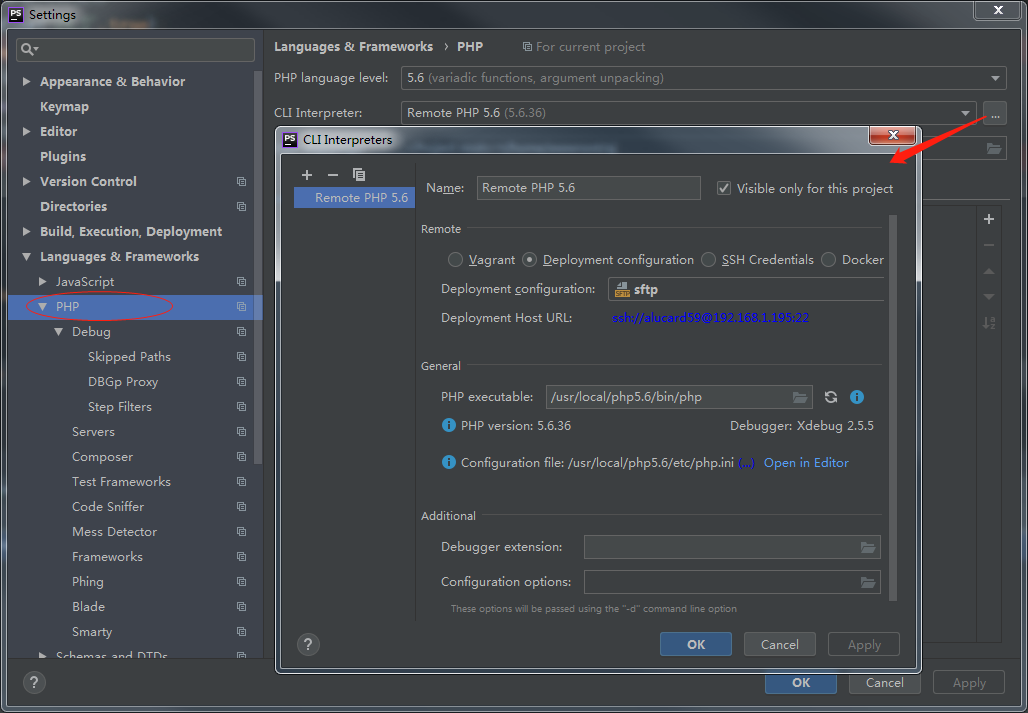
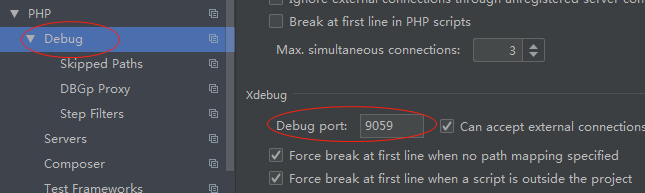
5、phpstorm的设置

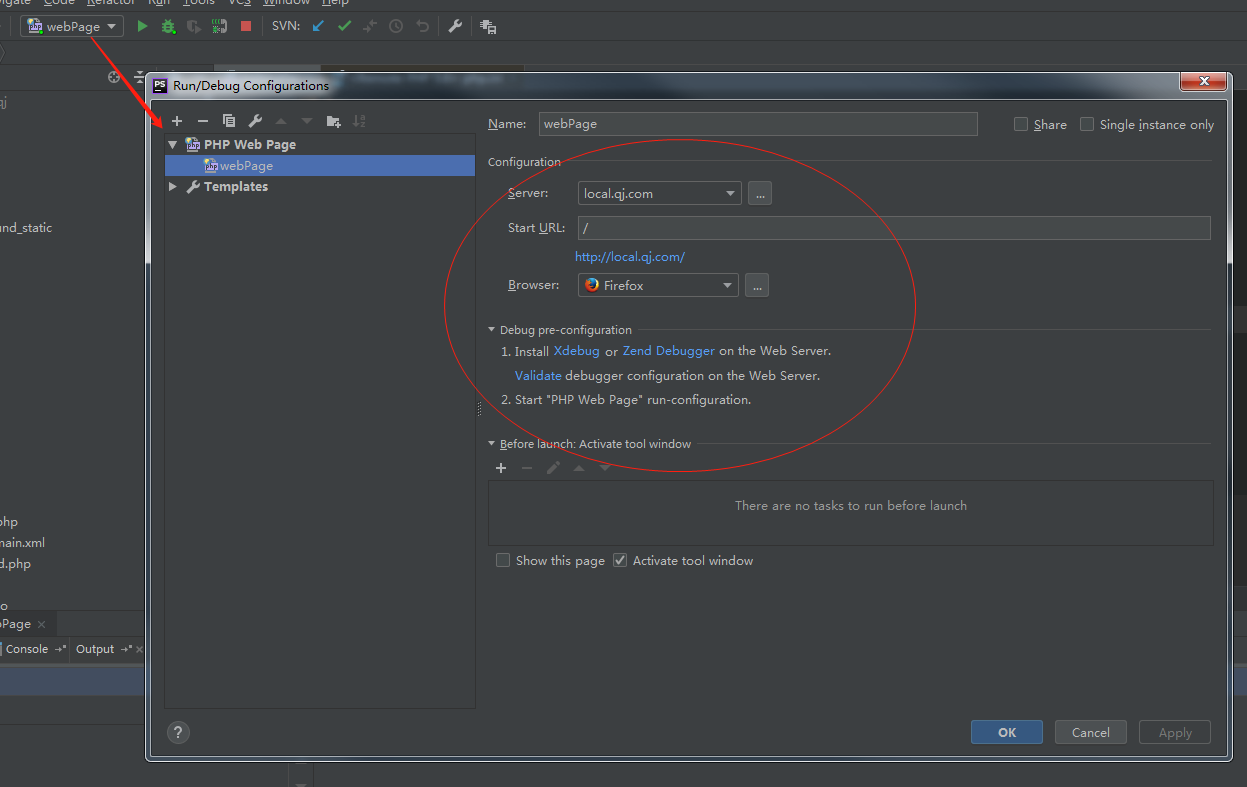
6、开始进行断点测试,断点测试前,可以进行xdebug的验证是否配置成功
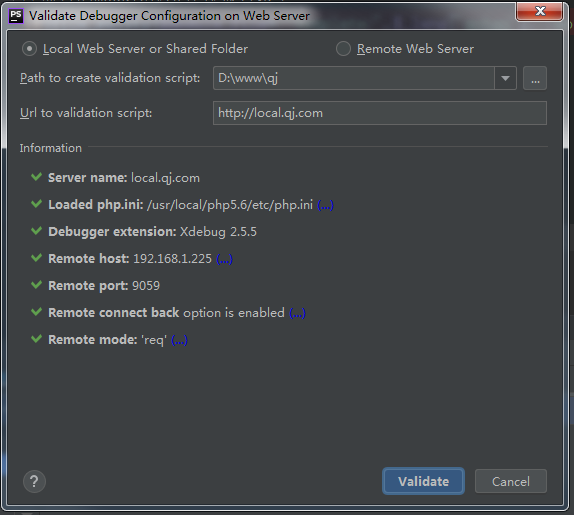
第一个地址栏填写你的项目的地址
第二个地址栏填写你访问的地址
点击validate开始验证,若有错误,根据提示修改配置。
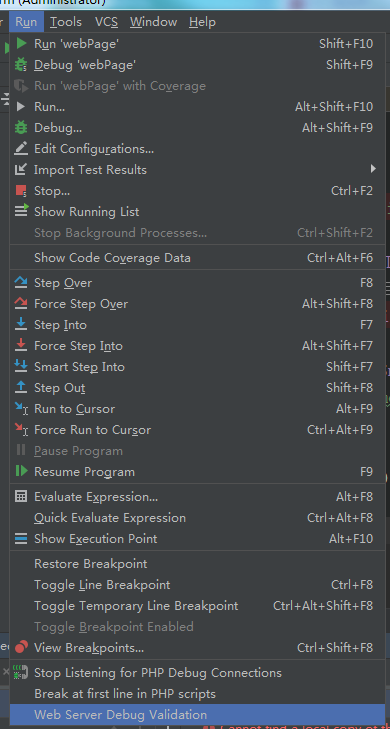
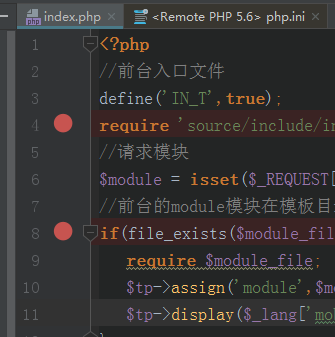
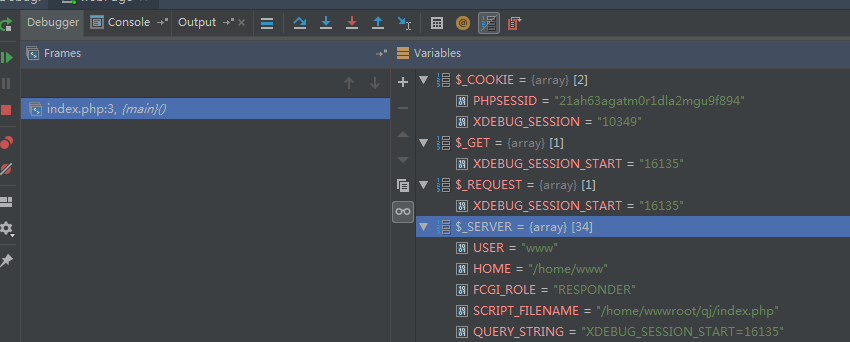
7、点击phpstorm小电话图标,开始监听,设置断点并并调试。

原理示意图(从xdebug的官网上引用的)
